
|
Railway wagons, Marley Hill Yard
by Adrian Taylor
geograph for square NZ2057
Old railway wagons awaiting restoration in the Tanfield Railway’s yard at Marley... (more)
|

|
Marley Hill Yard
by Adrian Taylor
geograph for square NZ2057
Sidings in the Tanfield Railway’s yard at Marley Hill. The railway’s workshop... (more)
|

|
End of the day at Marley Hill
by Adrian Taylor
geograph for square NZ2057
Andrew Barclay 0-6-0ST No. 1015 ‘Horden’, built in 1904, propels the Tanfield... (more)
|

|
The Tanfield Railway, Marley Hill
by Adrian Taylor
geograph for square NZ2057
Marley Hill Signalbox is placed at an angle to the track due to having... (more)
|

|
Tanfield Railway - Marley Hill engine shed, No. 49 and Horden
by Chris Allen
for square NZ2057
On the left is Horden - an 0-6-0ST built in 1904 by Andrew Barclay as works No.... (more)
|

|
Tanfield Railway - Marley Hill engine shed
by Chris Allen
for square NZ2057
Three locomotives are visible with a fourth hidden in the right rear corner. In... (more)
|

|
Marley Hill Yard
by Adrian Taylor
geograph for square NZ2057
The green shed is used to store the Tanfield Railway’s historic restored... (more)
|

|
Tanfield Railway - Marley Hill engine shed, Horden
by Chris Allen
for square NZ2057
Horden is an 0-6-0ST built in 1904 by Andrew Barclay as works No. 1015. It... (more)
|

|
Tanfield Railway - Marley Hill, No. 2 in the engine shed
by Chris Allen
for square NZ2057
No. 2 is an 0-4-0ST and was built by Hawthorn Leslie in 1911 as works No. 2859... (more)
|

|
Coaling and watering
by Adrian Taylor
for square NZ2057
Andrew Barclay 0-6-0ST locomotive ‘Horden’ is watered and coaled at Andrew’s... (more)
|

|
Bowes Railway, Marley Hill
by Christine Johnstone
geograph for square NZ2057
Seen from the flat crossing with the Tanfield Railway.
|

|
Tanfield Railway - Marley Hill Depot, steam hammer
by Chris Allen
for square NZ2057
A B & S Massey overhung steam hammer malingering in the open.
|

|
Tanfield Railway - narrow gauge locomotive at Marley Hill
by Chris Allen
for square NZ2057
This is a 3' 6" gauge 4-6-2 Pacific locomotive that was used in... (more)
|

|
Tanfield Railway - locomotive at Marley Hill
by Chris Allen
for square NZ2057
An unrestored 0-6-0ST in a line of unrestored rolling stock.
This locomotive... (more)
|

|
Tanfield Railway - wagons at Marley Hill
by Chris Allen
geograph for square NZ2057
Some of the better examples of rolling stock at this preserved railway.
|

|
Tanfield Railway - Marley Hill carriage shed
by Chris Allen
geograph for square NZ2057
|

|
Tanfield Railway - Marley Hill, Twizell
by Chris Allen
for square NZ2057
The diesel shunter has just hauled Twizell out of the shed to release the... (more)
|

|
Tanfield Railway - Marley Hill engine shed
by Chris Allen
geograph for square NZ2057
This was built in 1854 for the Pontop and Jarrow Railway. It is the world's... (more)
|

|
Tanfield Railway - Marley Hill engine shed
by Chris Allen
geograph for square NZ2057
This was built in 1854 for the Pontop and Jarrow Railway. It is the world's... (more)
|

|
Tanfield Railway - Marley Hill yard
by Chris Allen
geograph for square NZ2057
Seen from the top level of the derelict coal drops. This shows a large... (more)
|

|
Tanfield Railway - Marley Hill engine shed
by Chris Allen
geograph for square NZ2057
The engine shed is on the right and the disused coal drops on the left.
|

|
Tanfield Railway - Marley Hill engine shed
by Chris Allen
geograph for square NZ2057
At the beginning of the day and the smoke rising from the roof vent is due to a... (more)
|
|
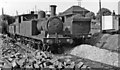
LNER 0-6-2Ts at Bowes Bridge, Marley Hill, 1954
by Walter Dendy, deceased
geograph for square NZ2057
View northward on the Stanhope & Tyne system near its junction with the... (more)
|
